
reminia/zendesk-mcp-server
Developer toolsこのページは AI により自動翻訳されています。技術的な詳細は原文をご確認ください。 原文を見る
reminia/zendesk-mcp-server は、https://github.com/reminia/zendesk-mcp-server. からインポートされたMCPサーバー候補です。
概要
reminia/zendesk-mcp-server は、https://github.com/reminia/zendesk-mcp-server. からインポートされたMCPサーバー候補です。
概要(AI 翻訳)
Zendesk用のモデルコンテキストプロトコルサーバーです。
このサーバーはZendeskとの包括的な統合を提供します。以下を提供します:
- Zendeskのチケットやコメントの取得および管理ツール
- チケット分析およびレスポンス作成のための専門的なプロンプト
- Zendeskヘルプセンターの記事へのナレッジベースへの完全アクセス
セットアップ
- ビルド:
uv venv && uv pip install -e .またはuv build。 - 認証の設定:以下の認証を参照してください。
- Claudeデスクトップで設定:
認証
このサーバーはOAuthで認証します。各オペレーターは自分の認証で認証します Zendeskのログイン、つまりAPI呼び出しはそのIDを持ち、Zendeskは正確に UIで適用される権限 — 役割、グループの制限、 チケットアクセス。投稿されるコメントは本人が作成しています。
APIトークン認証は依然として機能しますが、非推奨となっています。参照 APIトークンからの移行。
1.パブリックOAuthクライアントを登録する
管理センターで「OAuthクライアント>API>Apps and integrations」へ行ってください。 クライアント作成:
| フィールド | 値 |
|---|---|
| クライアントの種類 | Public — このサーバーは各オペレーターのマシン上で動作するため、秘密を保持することはできません。代わりにPKCEが使用されます。 |
このページは AI により自動翻訳されています。技術的な詳細は原文をご確認ください。
README
以下は原文 README の抜粋です。原文を見る。
Zendesk MCP Server


A Model Context Protocol server for Zendesk.
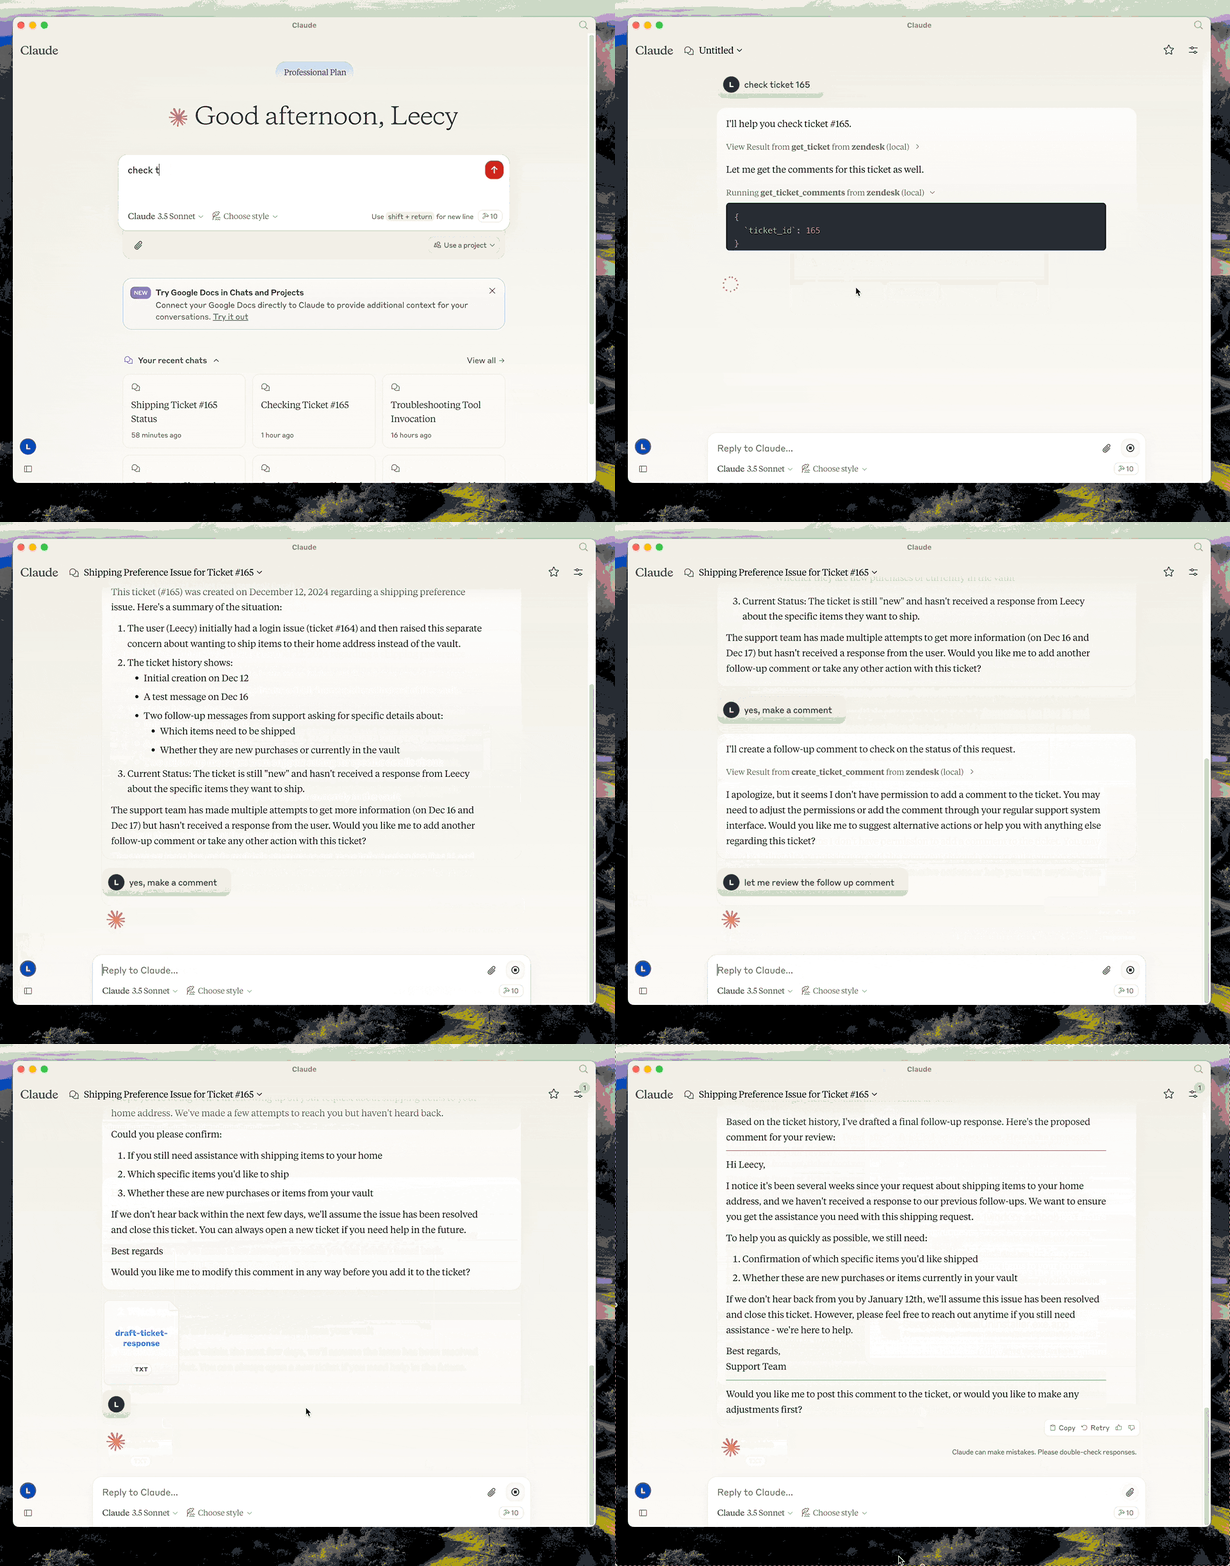
This server provides a comprehensive integration with Zendesk. It offers:
- Tools for retrieving and managing Zendesk tickets and comments
- Specialized prompts for ticket analysis and response drafting
- Full access to the Zendesk Help Center articles as knowledge base
Setup
- build:
uv venv && uv pip install -e .oruv buildin short. - configure authentication: see Authentication below.
- configure in Claude desktop:
{
  "mcpServers": {
      "zendesk": {
          "command": "uv",
          "args": [
              "--directory",
              "/path/to/zendesk-mcp-server",
              "run",
              "zendesk"
          ]
      }
  }
}
Authentication
This server authenticates with OAuth. Each operator authorizes with their own Zendesk login, so API calls carry their identity and Zendesk applies exactly the permissions it applies in the UI — their role, their group restrictions, their ticket access. Comments they post are authored by them.
API token authentication still works but is deprecated. See Migrating from an API token.
1. Register a public OAuth client
In Admin Center, go to Apps and integrations > APIs > OAuth clients and create a client:
| Field | Value |
|---|---|
| Client kind | Public — this server runs on each operator’s machine, so there is no secret it could keep. PKCE is used instead. |
| Redirect URLs | http://localhost:4567/callback |
| Allowed scopes | tickets:read tickets:write ticket_attachments:read users:read hc:read |
Setting Allowed scopes is optional but recommended: it caps what any token from this client can ever request, even if the code changes.
Note the client’s Identifier — that is the ZENDESK_CLIENT_ID below.
If Zendesk rejects http://localhost:4567/callback, register https://localhost
instead and use zendesk-auth --manual in step 3.
2. Configure the environment
Copy .env.example to .env and set:
ZENDESK_SUBDOMAIN=acme        # for https://acme.zendesk.com
ZENDESK_CLIENT_ID=your-client-identifier
Keep .env out of version control.
Two optional settings, both of which must agree with the OAuth client:
| Variable | Default | When to change it |
|---|---|---|
ZENDESK_OAUTH_REDIRECT_URI |
http://localhost:4567/callback |
Port 4567 is in use, or the client is registered with a different redirect URL. Must match a redirect URL on the client exactly. |
ZENDESK_TOKEN_FILE |
$XDG_CONFIG_HOME/zendesk-mcp/tokens.json |
Storing tokens elsewhere, for example a Docker volume. |
インストール
docker run --rm \設定
{
  "mcpServers": {
      "zendesk": {
          "command": "uv",
          "args": [
              "--directory",
              "/path/to/zendesk-mcp-server",
              "run",
              "zendesk"
          ]
      }
  }
}