
reminia/zendesk-mcp-server
Developer toolsЭта страница переведена автоматически. Технические детали смотрите в оригинале. Открыть оригинал
reminia/zendesk-mcp-server — это кандидат в MCP-сервер, импортированный из https://github.com/reminia/zendesk-mcp-server.
Обзор
reminia/zendesk-mcp-server — это кандидат в MCP-сервер, импортированный из https://github.com/reminia/zendesk-mcp-server.
Обзор (машинный перевод)
Сервер Model Context Protocol для Zendesk.
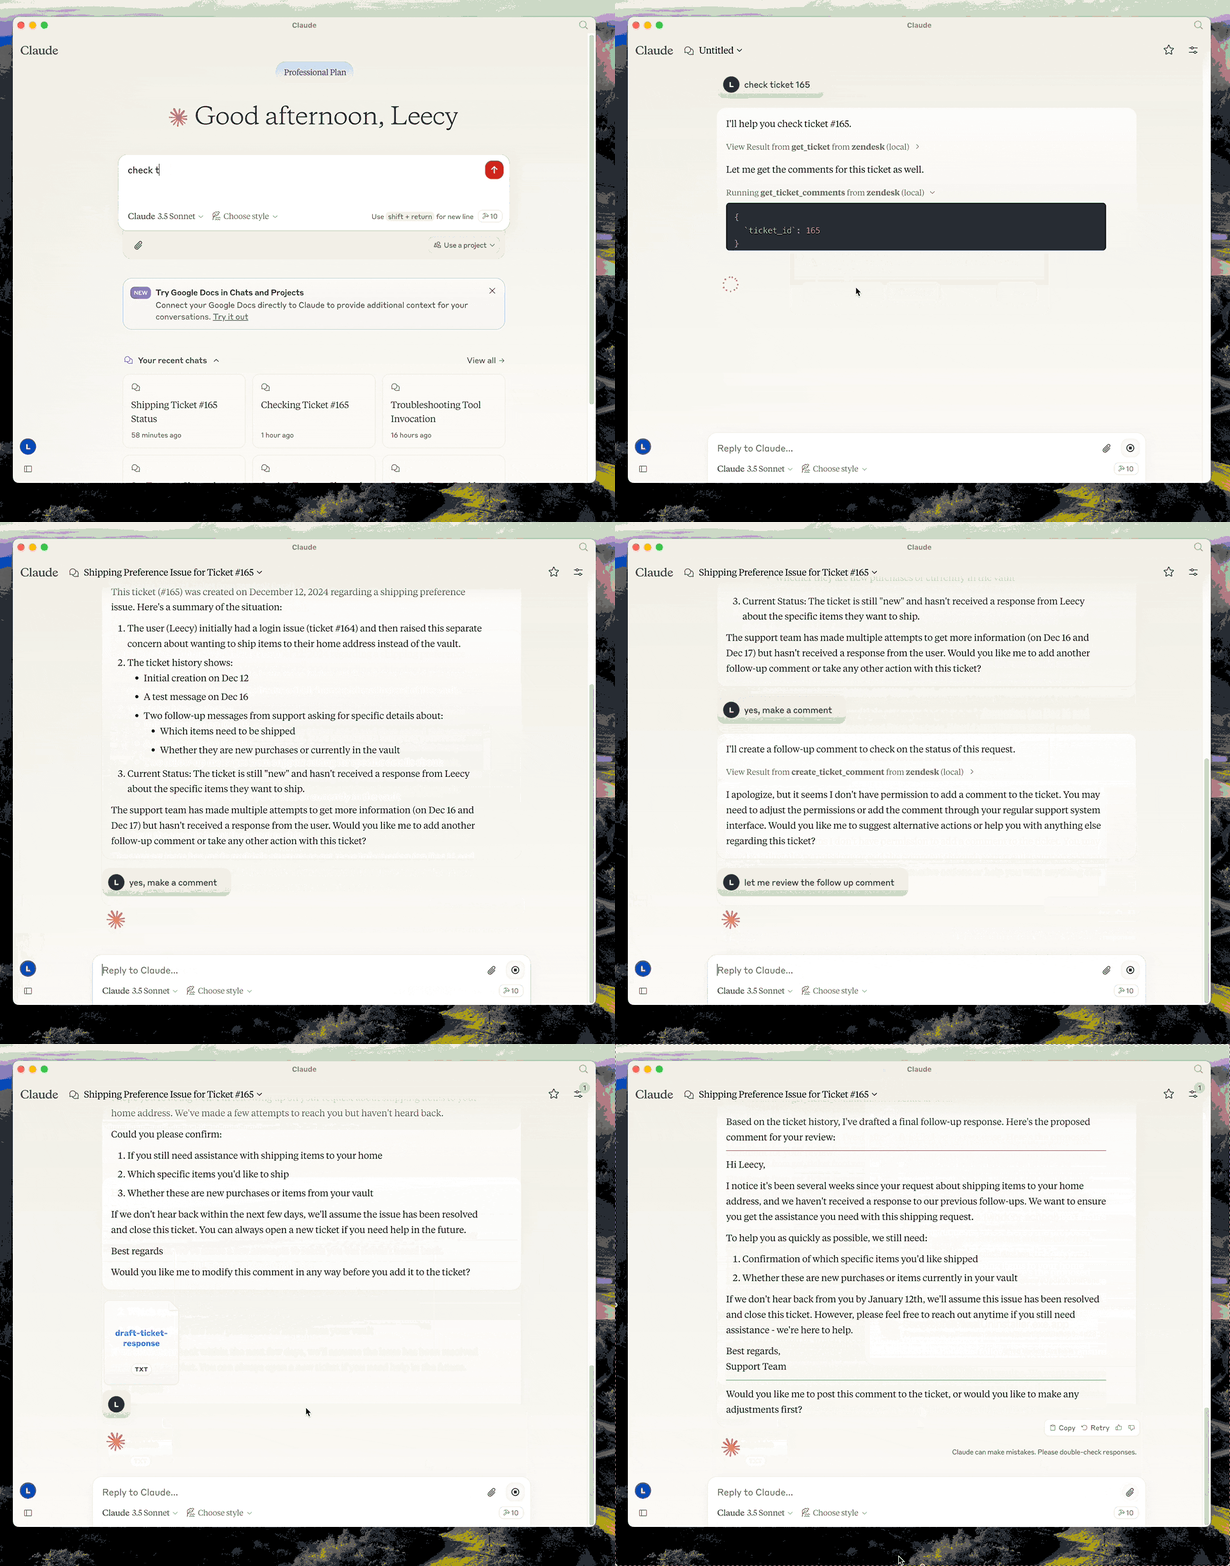
Этот сервер обеспечивает комплексную интеграцию с Zendesk. Он предлагает:
- Инструменты для поиска и управления тикетами и комментариями Zendesk
- Специализированные запросы для анализа заявок и составления ответов
- Полный доступ к статьям Центра поддержки Zendesk как к базе знаний
Подготовка
- билд:
uv venv && uv pip install -e .илиuv buildв кратком смысле. - настроить аутентификацию: см. раздел аутентификация ниже.
- настраивать на рабочем столе Claude:
Аутентификация
Этот сервер аутентифицируется с помощью OAuth. Каждый оператор авторизирует свой собственный Вход в Zendesk, поэтому API-вызовы несут свою идентичность, и Zendesk применяет именно разрешения, которые он применяется в пользовательском интерфейсе — их роль, ограничения группы, их Доступ к билетам. Комментарии, которые они оставляют, написаны ими.
Аутентификация токенов API всё ещё работает, но устарела. См. Миграция с токена API.
1. Зарегистрируйте публичный клиент OAuth
В Административном центре перейдите в раздел Приложения и интеграции > API > OAuth clients и Создайте клиента:
| Поле | Значение |
|---|---|
| Тип клиента | Публичный — этот сервер работает на машине каждого оператора, поэтому скрыть секрет нет. Вместо этого используется PKCE. |
Эта страница переведена автоматически. Технические детали смотрите в оригинале.
README
Показан фрагмент оригинального README. Открыть оригинал.
Zendesk MCP Server


A Model Context Protocol server for Zendesk.
This server provides a comprehensive integration with Zendesk. It offers:
- Tools for retrieving and managing Zendesk tickets and comments
- Specialized prompts for ticket analysis and response drafting
- Full access to the Zendesk Help Center articles as knowledge base
Setup
- build:
uv venv && uv pip install -e .oruv buildin short. - configure authentication: see Authentication below.
- configure in Claude desktop:
{
  "mcpServers": {
      "zendesk": {
          "command": "uv",
          "args": [
              "--directory",
              "/path/to/zendesk-mcp-server",
              "run",
              "zendesk"
          ]
      }
  }
}
Authentication
This server authenticates with OAuth. Each operator authorizes with their own Zendesk login, so API calls carry their identity and Zendesk applies exactly the permissions it applies in the UI — their role, their group restrictions, their ticket access. Comments they post are authored by them.
API token authentication still works but is deprecated. See Migrating from an API token.
1. Register a public OAuth client
In Admin Center, go to Apps and integrations > APIs > OAuth clients and create a client:
| Field | Value |
|---|---|
| Client kind | Public — this server runs on each operator’s machine, so there is no secret it could keep. PKCE is used instead. |
| Redirect URLs | http://localhost:4567/callback |
| Allowed scopes | tickets:read tickets:write ticket_attachments:read users:read hc:read |
Setting Allowed scopes is optional but recommended: it caps what any token from this client can ever request, even if the code changes.
Note the client’s Identifier — that is the ZENDESK_CLIENT_ID below.
If Zendesk rejects http://localhost:4567/callback, register https://localhost
instead and use zendesk-auth --manual in step 3.
2. Configure the environment
Copy .env.example to .env and set:
ZENDESK_SUBDOMAIN=acme        # for https://acme.zendesk.com
ZENDESK_CLIENT_ID=your-client-identifier
Keep .env out of version control.
Two optional settings, both of which must agree with the OAuth client:
| Variable | Default | When to change it |
|---|---|---|
ZENDESK_OAUTH_REDIRECT_URI |
http://localhost:4567/callback |
Port 4567 is in use, or the client is registered with a different redirect URL. Must match a redirect URL on the client exactly. |
ZENDESK_TOKEN_FILE |
$XDG_CONFIG_HOME/zendesk-mcp/tokens.json |
Storing tokens elsewhere, for example a Docker volume. |
Установка
docker run --rm \Конфигурация
{
  "mcpServers": {
      "zendesk": {
          "command": "uv",
          "args": [
              "--directory",
              "/path/to/zendesk-mcp-server",
              "run",
              "zendesk"
          ]
      }
  }
}