
An MCP server that allows Agents to interact with a running Roblox game client — execute code, inspect scripts, spy on remotes, and more.
Overview
An MCP server that allows Agents to interact with a running Roblox game client — execute code, inspect scripts, spy on remotes, and more. Roblox Executor MCP includes a local web dashboard at: Use it to see connected Roblox clients, inspect scripts, run tools, view server logs, configure semantic search, and index games for semantic script search. - — Run Lua code and fetch data from the game client. - — Decompile scripts and search across all sources. - — CSS-like selectors and hierarchy trees. - — Intercept, log, block, and ignore Remotes/Bindables via Cobalt. - — Click buttons and type into text boxes. - — Capture Roblox window screenshots (Windows only). - — Connect multiple Roblox clients at once. - — Multiple MCP instances auto-coordinate with automatic promotion. Supports remote relaying via --baseurl. See Advanced. - ≥ 18 - ≥ 1.
README
Roblox Executor MCP Server
An MCP server that allows Agents to interact with a running Roblox game client — execute code, inspect scripts, spy on remotes, and more.
Dashboard
Roblox Executor MCP includes a local web dashboard at:
http://localhost:16384/
Use it to see connected Roblox clients, inspect scripts, run tools, view server logs, configure semantic search, and index games for semantic script search.
Features
- Code Execution — Run Lua code and fetch data from the game client.
- Script Inspection — Decompile scripts and search across all sources.
- Instance Search — CSS-like selectors and hierarchy trees.
- Remote Spy — Intercept, log, block, and ignore Remotes/Bindables via Cobalt.
- GUI Interaction — Click buttons and type into text boxes.
- Screenshot — Capture Roblox window screenshots (Windows only).
- Multi-Client — Connect multiple Roblox clients at once.
- Primary / Secondary — Multiple MCP instances auto-coordinate with automatic promotion. Supports remote relaying via
--baseurl. See Advanced.
Tutorial
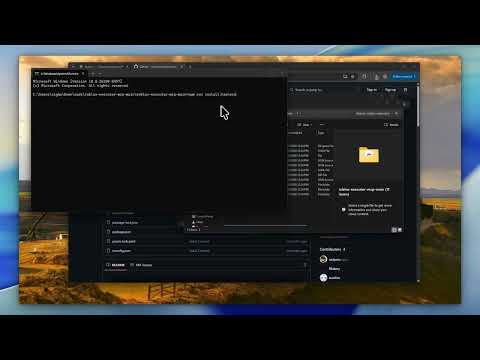
Prerequisites
- Node.js ≥ 18
- Bun ≥ 1.3 for the interactive OpenTUI harness installer
- A Roblox executor that supports
loadstring,request, and (preferably)WebSocket
Quick Start
1. Clone the server
git clone https://github.com/dissering/roblox-executor-mcp.git
cd roblox-executor-mcp
2. Run the harness installer
The installer builds the server, lets you choose AI clients, writes supported MCP configs, and prints the Roblox loader script.
npm run install:harnesses
The normal server build consumes the committed connector.luau artifact, so harness installs do not require Darklua. Connector developers can install the pinned tool with rokit install, edit connector-src/, and regenerate the artifact with npm run build:connector.
The picker is built with OpenTUI and runs through Bun. npm run install:harnesses installs Bun first if it is not already available. It shows detected local clients by default; if none are detected, it warns you to install a harness first. Press s in the picker or pass --show-all-harnesses to reveal every supported config target. If your terminal has trouble with the interactive picker, use the plain numbered prompt:
npm run install:harnesses -- --plain
The installer can also place the Roblox loader into a detected executor autoexec folder, such as MacSploit on macOS or supported Windows executor autoexec folders. Use the prompt, or run:
npm run getscript -- --autoexec
It can also help with:
- cross-machine setup on the same LAN
- copying the Roblox loader to your clipboard
- optional Ollama
embeddinggemmasetup for semantic indexing - pulling latest repo changes before install/build
To update an existing install later, run:
npm run update
The update command can stop currently running MCP server processes, optionally pull latest changes, and always rebuilds the server.
Manual setup
If you prefer to configure a client yourself, use the setup guide for your client:
| Client | Guide |
|---|---|
| Cursor | Setup Guide |
| Claude Desktop | Setup Guide |
| Claude Code | Setup Guide |
| Codex CLI | Setup Guide |
| Windsurf | Setup Guide |
| Antigravity | Setup Guide |
| BLACKBOX AI | Setup Guide |
| ZCode | Setup Guide |
| Mobile | Mobile Setup Guide |
3. Connect from Roblox
The installer prints this for you. Put it in your executor or Auto Execute:
while not getgenv().MCP_Loaded do
    local bridgeUrl = getgenv().BridgeURL or "localhost:16384"
    pcall(function() loadstring(game:HttpGet("http://" .. bridgeUrl .. "/script.luau"))() end)

    task.wait(0.15)
end
Optional settings (set before the loadstring):
getgenv().BridgeURL = "10.0.0.4:16384"                  -- default: localhost:16384
getgenv().DisableWebSocket = true                        -- force HTTP polling
getgenv().DisableInitialScriptDecompMapping = true       -- skip initial decompilation
getgenv().MCP_FailedScriptResyncInterval = 30            -- retry failed script syncs periodically
getgenv().MCP_FailedScriptResyncBatchSize = 8            -- bound each periodic retry batch
After the MCP server starts and Roblox connects, open the dashboard:
http://localhost:16384/
Mobile Support
This MCP server works with mobile Roblox executors (Delta, CodeX, VegaX, etc.) on Android and iOS.
Mobile-Only (No PC Needed) — Android
Run everything from your phone using Termux. See the Mobile-Only Setup Guide.
# In Termux:
git clone https://github.com/vonsalt/mcp-mobile.git
cd mcp-mobile
bash termux-setup.sh
bash termux-start.sh --cf
Then in your Roblox executor:
loadstring(game:HttpGet("http://localhost:16384/mobile-connector.luau"))("localhost:16384")
Mobile-Only (No PC Needed) — iOS
Deploy the MCP server to a free cloud service (Railway/Render). Your iPhone connects to it over HTTPS. See the iOS Cloud Setup Guide.
-- In your Roblox executor:
getgenv().BridgeURL = "https://YOUR-APP.up.railway.app"
getgenv().MCP_AUTH_TOKEN = "your-token"
loadstring(game:HttpGet("https://YOUR-APP.up.railway.app/mobile-connector.luau"))()
Mobile + PC Setup
If you have a PC, see the Mobile Setup Guide and Mobile README.
loadstring(game:HttpGet("http://YOUR_PC_IP:16384/mobile-connector.luau"))("YOUR_PC_IP:16384")
Custom AI Integration
This server includes a built-in AI chat interface — no separate AI client needed. It supports any Anthropic-compatible API with custom endpoints, so you can use Claude, DeepSeek, or any compatible provider.
Setup
- Open the chat page in your browser:
http://localhost:16384/ai          # local
https://YOUR-APP.up.railway.app/ai  # cloud
- Tap Settings and configure:
- API Key — your API key
- Base URL — the Anthropic-compatible endpoint (e.g.
https://api.anthropic.com,https://gateway.olagon.site/anthropic) - API Version — e.g.
2023-06-01 - Default Model — e.g.
claude-sonnet-4-20250514 - Extended Thinking — toggle to show the AI’s reasoning process
- Start chatting — the AI can use all MCP tools (execute code, inspect scripts, search, GUI interaction, etc.)
Environment Variables (optional, for cloud deployment)
| Env Var | Default | Description |
|---|---|---|
CUSTOM_AI_API_KEY |
— | API key |
CUSTOM_AI_BASE_URL |
https://api.anthropic.com |
Anthropic-compatible base URL |
CUSTOM_AI_API_VERSION |
2023-06-01 |
API version header |
CUSTOM_AI_MODEL |
claude-sonnet-4-20250514 |
Default model |
CUSTOM_AI_MAX_TOKENS |
16000 |
Max response tokens |
CUSTOM_AI_THINKING_ENABLED |
false |
Enable extended thinking |
CUSTOM_AI_THINKING_BUDGET |
10000 |
Thinking token budget |
Community
Have a suggestion or need help? Join the Discord server.
Security
This server allows arbitrary code execution. Only use with AI clients you trust. Port
16384has no authentication — never expose it to the internet. For cross-machine setups, use a local network, VPN, or SSH tunnel. See Advanced for details.
License
Install
This server does not publish a one-line install command.
Open the repository installation guide New to MCP? Start with the mcpskill.org guide →