
ykhli/mcp-light-control
Developer toolsЭта страница переведена автоматически. Технические детали смотрите в оригинале. Открыть оригинал
MCP server to control Philips Hue lights, including sending Morse code through them
Обзор
This MCP server allows Cursor or Claude Desktop to . 💡💡: tell Cursor agent to send a Morse code message to you when it's done with a task. https://www.youtube.com/watch?v=GM1l98TtZmk - Philips Hue bridge and lights - Hue bridge username (API key) - Node.js (v14 or higher) - Cursor or Claude Desktop 1. Clone this repository locally. 2. Obtain your Philips Hue bridge IP address and username. If you don't have one, run the discovery script: Follow the prompts to press the link button on your Hue bridge and receive your API key. 3. Run npm install followed by npm run build in the project directory. This will generate the MCP server script in the /build directory. 4. Add the following MCP configuration. In Cursor it's under Settings -> MCP -> Add new MCP server. In Claude Desktop it's under Settings -> MCP -> Add new MCP server.
README
Показан фрагмент оригинального README. Открыть оригинал.
Morse Code Light MCP Server (Philips Hue) 💡
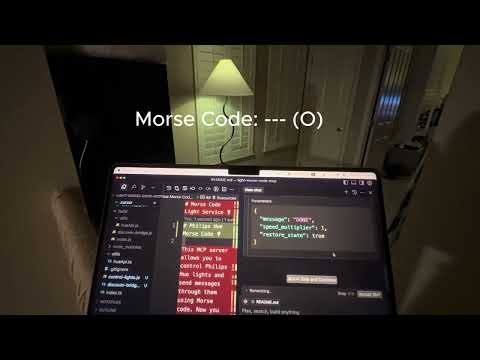
This MCP server allows Cursor or Claude Desktop to control Philips Hue lights and send messages through them using Morse code.
💡Example use case💡: tell Cursor agent to send a Morse code message to you when it’s done with a task.
Demo
https://www.youtube.com/watch?v=GM1l98TtZmk
Built with:
Setup
Prerequisites
- Philips Hue bridge and lights
- Hue bridge username (API key)
- Node.js (v14 or higher)
- Cursor or Claude Desktop
Local API Setup
-
Clone this repository locally.
-
Obtain your Philips Hue bridge IP address and username. If you don’t have one, run the discovery script:
node build/discover-bridge.jsFollow the prompts to press the link button on your Hue bridge and receive your API key.
-
Run
npm installfollowed bynpm run buildin the project directory. This will generate the MCP server script in the/builddirectory. -
Add the following MCP configuration. In Cursor it’s under Settings -> MCP -> Add new MCP server. In Claude Desktop it’s under Settings -> MCP -> Add new MCP server.
{
  "mcpServers": {
    "control_lights": {
      "command": "node",
      "args": ["ABSOLUTE_PATH_TO_MCP_SERVER/build/index.js"],
      "env": {
        "HUE_USERNAME": "YOUR_HUE_USERNAME",
        "BRIDGE_IP": "YOUR_BRIDGE_IP"
      }
    }
  }
}
Remote API Setup
This project supports controlling your Philips Hue lights remotely (from outside your local network) using the Hue Remote API. This enables you to control your lights from anywhere with an internet connection.
Getting Remote API Credentials
-
Create a Hue Developer Account:
- Register at https://developers.meethue.com/
-
Create a Remote Hue API App:
- Go to https://developers.meethue.com/my-apps/
- Create a new app with these details:
- App name: Choose a name for your app
- Callback URL: Use
http://localhost/for simple testing - Application description: Brief description of your app
- After creating the app, you’ll receive:
- Client ID
- Client Secret
-
Get Access and Refresh Tokens:
a. Construct an authorization URL and open it in your browser:
https://api.meethue.com/oauth2/auth?clientid=YOUR_CLIENT_ID&response_type=code&state=anystring&appid=YOUR_APP_NAME&deviceid=test-device&devicename=TestDeviceReplace
YOUR_CLIENT_IDandYOUR_APP_NAMEwith your values.b. Log in with your Hue developer account and authorize the app.
c. You’ll be redirected to your callback URL with a code parameter.
d. Extract the code from the URL (e.g.,
?code=abcd1234&state=anystring).
Установка
This server does not publish a one-line install command.
Open the repository installation guide Новичок в MCP? Начните с руководства на mcpskill.org →Конфигурация
{
  "mcpServers": {
    "control_lights": {
      "command": "node",
      "args": ["ABSOLUTE_PATH_TO_MCP_SERVER/build/index.js"],
      "env": {
        "HUE_USERNAME": "YOUR_HUE_USERNAME",
        "BRIDGE_IP": "YOUR_BRIDGE_IP"
      }
    }
  }
}