
reminia/zendesk-mcp-server
Developer tools이 페이지는 AI로 자동 번역되었습니다. 기술적인 세부 사항은 원문을 확인하세요. 원문 보기
reminia/zendesk-mcp-server는 [[T0]에서 가져온 MCP 서버 후보입니다.
개요
reminia/zendesk-mcp-server는 [[T0]에서 가져온 MCP 서버 후보입니다.
개요(AI 번역)
Zendesk용 모델 컨텍스트 프로토콜 서버입니다.
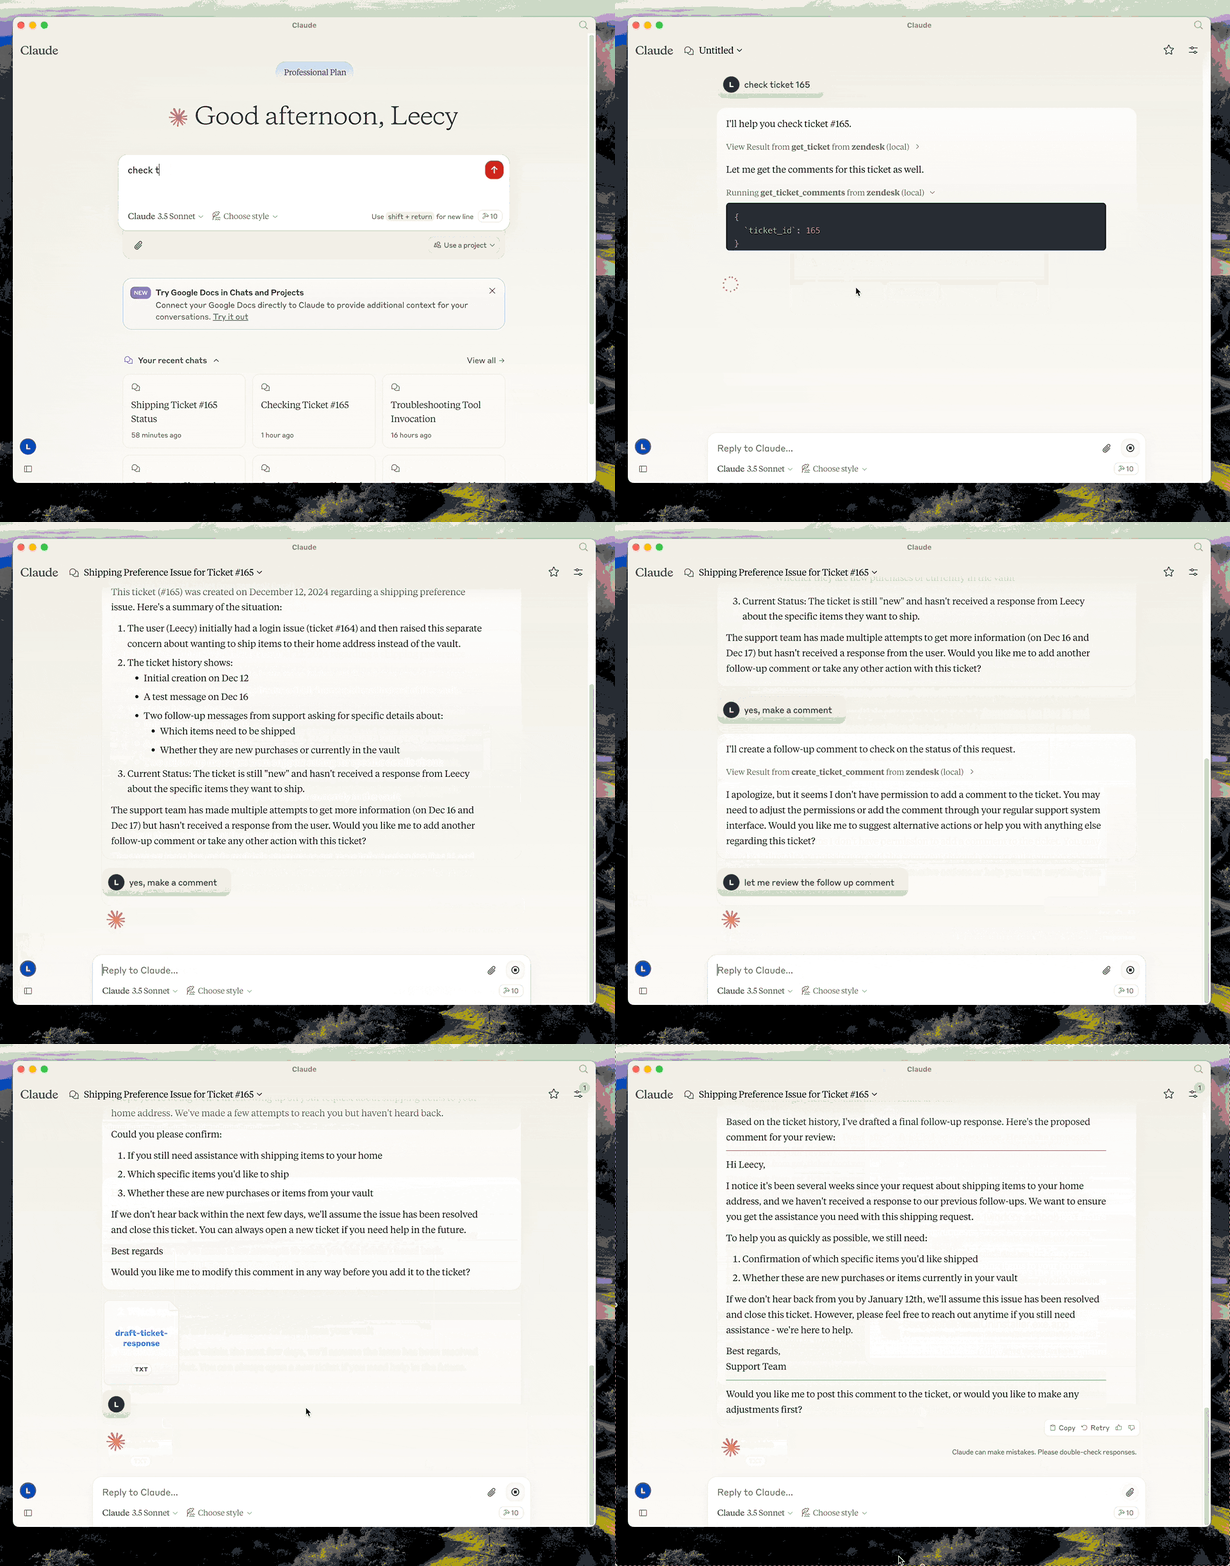
이 서버는 Zendesk와의 포괄적인 통합을 제공합니다. 다음과 같은 기능을 제공합니다:
- Zendesk 티켓 및 코멘트 검색 및 관리 도구
- 티켓 분석 및 응답 작성을 위한 특수 프롬프트
- Zendesk Help Center 문서 지식 기반으로의 완전 접근 권한
준비
- 빌드:
uv venv && uv pip install -e .또는uv build. - 인증 설정: 아래 인증 항목을 참조하세요.
- Claude 데스크톱에서 구성:
인증
이 서버는 OAuth로 인증합니다. 각 운영자는 자신만의 인증으로 인증합니다 Zendesk 로그인, 즉 API 호출이 그 식별자를 가지고 Zendesk가 정확히 적용되도록 합니다. UI에서 적용되는 권한 — 그들의 역할, 그룹 제한, 티켓 접근 권한. 그들이 올리는 댓글은 그들이 작성한 것입니다.
API 토큰 인증은 여전히 작동하지만 더 이상 지원되지 않습니다. 참고하세요 API 토큰에서 마이그레이션하는 중입니다.
1. 공개 OAuth 클라이언트를 등록하세요
관리자 센터에서 Apps and integrations > API > OAuth 클라이언트로 가세요 클라이언트 생성:
| 필드 | 가치 |
|---|---|
| 클라이언트 종류 | Public — 이 서버는 각 운영자의 컴퓨터에서 실행되므로 비밀을 유지할 수 없습니다. 대신 PKCE가 사용됩니다. |
이 페이지는 AI로 자동 번역되었습니다. 기술적인 세부 사항은 원문을 확인하세요.
README
원문 README의 일부입니다. 원문 보기.
Zendesk MCP Server


A Model Context Protocol server for Zendesk.
This server provides a comprehensive integration with Zendesk. It offers:
- Tools for retrieving and managing Zendesk tickets and comments
- Specialized prompts for ticket analysis and response drafting
- Full access to the Zendesk Help Center articles as knowledge base
Setup
- build:
uv venv && uv pip install -e .oruv buildin short. - configure authentication: see Authentication below.
- configure in Claude desktop:
{
  "mcpServers": {
      "zendesk": {
          "command": "uv",
          "args": [
              "--directory",
              "/path/to/zendesk-mcp-server",
              "run",
              "zendesk"
          ]
      }
  }
}
Authentication
This server authenticates with OAuth. Each operator authorizes with their own Zendesk login, so API calls carry their identity and Zendesk applies exactly the permissions it applies in the UI — their role, their group restrictions, their ticket access. Comments they post are authored by them.
API token authentication still works but is deprecated. See Migrating from an API token.
1. Register a public OAuth client
In Admin Center, go to Apps and integrations > APIs > OAuth clients and create a client:
| Field | Value |
|---|---|
| Client kind | Public — this server runs on each operator’s machine, so there is no secret it could keep. PKCE is used instead. |
| Redirect URLs | http://localhost:4567/callback |
| Allowed scopes | tickets:read tickets:write ticket_attachments:read users:read hc:read |
Setting Allowed scopes is optional but recommended: it caps what any token from this client can ever request, even if the code changes.
Note the client’s Identifier — that is the ZENDESK_CLIENT_ID below.
If Zendesk rejects http://localhost:4567/callback, register https://localhost
instead and use zendesk-auth --manual in step 3.
2. Configure the environment
Copy .env.example to .env and set:
ZENDESK_SUBDOMAIN=acme        # for https://acme.zendesk.com
ZENDESK_CLIENT_ID=your-client-identifier
Keep .env out of version control.
Two optional settings, both of which must agree with the OAuth client:
| Variable | Default | When to change it |
|---|---|---|
ZENDESK_OAUTH_REDIRECT_URI |
http://localhost:4567/callback |
Port 4567 is in use, or the client is registered with a different redirect URL. Must match a redirect URL on the client exactly. |
ZENDESK_TOKEN_FILE |
$XDG_CONFIG_HOME/zendesk-mcp/tokens.json |
Storing tokens elsewhere, for example a Docker volume. |
설치
docker run --rm \설정
{
  "mcpServers": {
      "zendesk": {
          "command": "uv",
          "args": [
              "--directory",
              "/path/to/zendesk-mcp-server",
              "run",
              "zendesk"
          ]
      }
  }
}